contact us

Use the form on the right to contact us.

You can edit the text in this area, and change where the contact form on the right submits to, by entering edit mode using the modes on the bottom right.


123 Street Avenue, City Town, 99999

(123) 555-6789

email@address.com


You can set your address, phone number, email and site description in the settings tab.
Link to read me page with more information.

used - sukasana.jpg

Blog


Filtering by Tag: arm balance

Transitions: kicking up into handstand

Olivia Marley

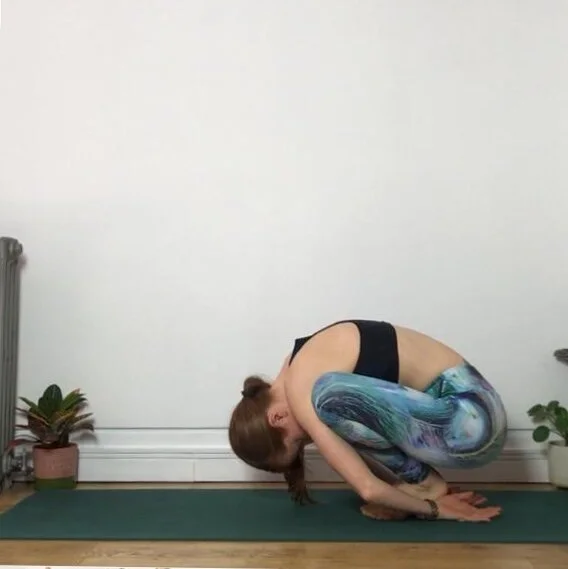
There’s more than one way to get into a handstand. This post covers the way most people try first: kicking up, and shows some of the errors I see students make most often. We made this our class focus recently: rather than getting into a handstand and trying to hold it for as long as possible, focusing instead on how to improve the transition into the pose.

In the first clip you can see that both of my legs are bent. The plus points for this method is that it gets your feet off the floor, and you can see I start the motion with my top leg low (which allows me to get a bit of momentum going). But it feels a bit out of control, so doesn’t give a steady foundation to build upon to try and get a little closer to the pose.

For me, kicking up works best when I keep my top leg straight (so it swings up like a pendulum) and only bend my bottom leg (so the bottom leg acts like a spring). Compare how this first video looks - in particular what my top leg looks like, and how fast/ slow I’m moving - to the last video in this post.

In the next clip I've corrected my mistake of bending my top knee, but am now showing two more errors. One is that I get my top leg as high as I can, then try and kick up from there. If your top leg is already as high as possible you don’t give yourself any room to swing it.

Towards the end of this clip I’m also starting with my bottom foot flat on the floor. If you consider that your bottom leg is meant to act like a spring here to help you kick up, having the sole of your standing foot flat on the floor means that you’re taking out the springing potential that you could be creating from your ankle (and only really springing from your knee).

Compare how this looks - in particular how much my top leg moves, and how I use my bottom foot - to the last video in this post.

In this last video I’m still not trying to get all the way into a handstand, I’m just practising my kick up transition. I’ve corrected the errors from the last two videos. The things I’m focusing on here are:

  • Keeping my arms completely straight and actively pushing the floor away from me

  • Gripping with my fingertips

  • Coming on to the tiptoes of my standing foot, and bending my bottom knee and ankle a lot at the start of their springing action

  • Not swinging my bottom leg away from my hands as I spring, and instead thinking of springing straight up towards the ceiling

  • Keeping my top leg straight and bringing it low at the bottom of the spring so I can swing it higher at the top of the spring

  • Keeping my front side core muscles a little switched on (like I’m trying to cinch in my lower ribs and belly a bit

  • Moving slowly and not flailing my legs around!

Have you been trying to kick up as shown in either of the first two videos here? If so, how does it feel to try it like I am in the third video? Comment below or send us a message with any questions!

Transitions: malasana (garland pose/ squat) to bakasana (crow/ crane pose)

Olivia Marley

The transitions we’ve looked in this series so far have been moving from standing on two feet to standing on one foot. In this way, we’ve been moving from a more to a less balanced pose. The transition this blog post is about takes you from being on your feet to your hands but in a way it’s still the same: moving from a more to a less stable posture. For each of the previous two transitions (if you missed them see my posts here and here) I cued my students to move slowly and minimise using momentum. We also made as much of the shape of the less stable pose as we could with both feet on the floor and made the transition simply about shifting your weight (ie not about launching yourself forwards or up). In that way, students (hopefully!) were able to tune in more closely to what was working to hold them steady, what was working to move them slowly, and maintain slow steady breathing. All that same work applied this week to shifting from a squatting position (malasana) to crow/ crane pose (bakasana). 

We’d looked at trying to get into crow pose and hold it a few weeks before in class so I knew my students were familiar with this posture (see that week’s blog here). So this week, since we were approaching the same pose but as part of a transition, instead of holding it we were moving in and out of the pose in time with our breathing.

Start in malasana, or a relaxed squat. I’ve got my big toes together here and my knees apart, and I’m dropping my chest as low down between my legs as it’ll go. This means my knees are as high up towards my armpits as they can go (which will be useful as we progress towards the next pose).

Before you move on from here, squeeze your legs in against your upper arms. Keep squeezing them through all the steps that follow!

@yogawitholivia malasana

To get to this shape I’ve changed 3 main things from the picture above:

  • I’ve planted my palms on the floor in front of my feet and slid my hands back so my arms are pressing on my shins

  • Lifted my heels

  • Lifted my bum

In the introduction to this blog I talked about making as much of the unstable pose as you can with both feet on the floor. This shape looks like bakasana but we’re not quite there yet!

@yogawitholivia bakasana transition 1

This is as much of bakasana as I can make with my feet on the floor. I’ve kept everything the same from the last picture (legs squeezing in, hips lifting high, fingertips gripping the floor) and now I’ve also shifted my weight forwards so it’s more over my hands. Arm balances aren’t about lifting up - they’re about getting in position and then shifting your weight forwards so that your feet can lift up.

@yogawitholivia bakasana transition 2

You can see that everything in this photo is exactly the same as the last picture, except that I’ve bent my knees, pointed my toes and brought my feet to my bum.

Since we’re looking more at the transition rather than simply trying to hold this pose, this is how I was cueing my students:

‘Inhale come up on to your tiptoes (ie photo 3); exhale shift your weight forwards and lift your feet (ie photo 4); inhale hold there; exhale bring your toes back down again’. We went through that transition (photo 3-4) and back again three times. Please ask if anything is unclear!

@yogawitholivia bakasana

yoga for core strength and awareness part 3: your sides (twists)

Olivia Marley

We’re continuing our look at core in class this week and staying working the sides of your body. Last week we were looking at side bends and side plank (vasistasana). This week we’ve shifted our attention to twists. The key posture we’ll be building towards is parsva bakasana or side crow/ crane pose.

There are a couple of different ways to do this posture – this video shows the variation that I find fires up my core muscles most and feels most buoyant once I’m in it. Differences from how you may have done this pose before include the placement of my hands; resting my hips on one arm not two; and the adjustment at the end to lift my feet higher. If you notice me pausing at different points in this video, the pauses align with the ‘steps’ I’ve written for you below!

The steps I go through in this video are:

  1. Start in a squat with your legs together, heels lifted and your hands in prayer. Then twist to your right and hook your left elbow on the outside of your right knee

  2. Take a couple of goes to get your elbow as far down the outside of your knee as you can. Holding your right thigh in place with your right hand might help you

  3. Keep pressing your left arm against your leg and place your left hand on the floor so that your fingers are pointing in the same direction as your toes. Place your other hand on the floor shoulder distance away from the first hand (not too close together!)

  4. Lift your hips

  5. Shift your weight over towards your right arm and bend your elbows to a chaturanga-like position (see a post here about the posture chaturanga dandasana if you’re not sure what it looks like!)

  6. Lean forwards until there is so much of your body weight forward of your hands that your feet start to get light and maybe lift

  7. If your feet lift and you feel steady enough, try to roll your top hip forwards (so for me here that would mean towards the camera). Feel how this creates more twist in your body and lifts your feet higher.

If you can't get through all of these steps first time don't worry. Just pay attention to which step you get stuck on, because that might tell you something about your body. For example, if it's hooking your elbow on the outside of your knee that's difficult, you might need to work on your twists and outer hip mobility to get into this pose. If it's lifting your hips up that's tough it might be a lack of core strength, or if you feel like your arms can't hold you it could be upper body strength.

As always - please just ask any questions that come up!